Creating Tasks
There are several ways to add tasks to your GlidePath project. This guide covers each method and explains when to use them.Feature Spec Reference
Module 2.1 — Create TaskMethod 1: Insert Key (Quickest)
While the Gantt chart is focused, press Insert to create a new task in the selected row.- Click on the task row where you want to insert
- Press Insert
- A new blank row appears with focus on the Name field
- Type the task name and press Enter
Method 2: Toolbar Button
- Click the + Add Task button in the Gantt chart toolbar
- A new task row appears at the bottom of the current view
- Click the Name cell to start typing
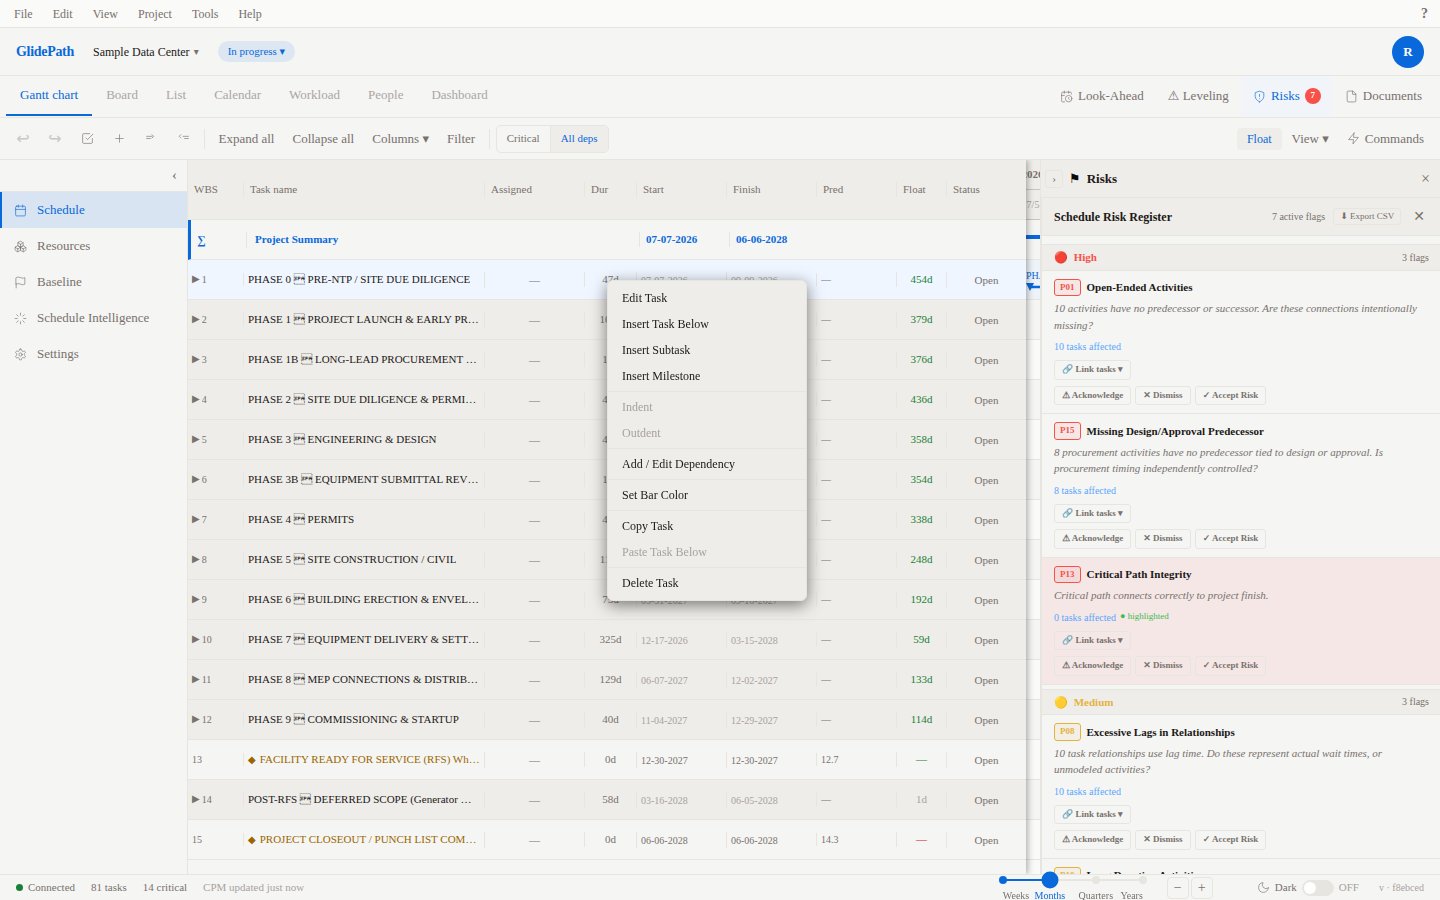
Method 3: Right-Click Menu
- Right-click on any task row
- Select Insert Task Above or Insert Task Below
- A new blank row appears in the chosen position
- Click the Name cell to start typing
Method 4: Inline Row Editing
- Click the first empty row at the bottom of the task list
- Click in the Name cell
- Type the task name
Setting Default Values
When you create a new task, GlidePath automatically populates:- WBS Number: Auto-generated based on position in hierarchy (1.1, 1.2, 1.3, etc.)
- Start Date: Today’s date (configurable in preferences)
- Duration: 1 day (configurable in preferences)
- Progress %: 0%
- Constraint Type: ASAP (as soon as possible)
Auto-WBS Numbering
GlidePath automatically assigns WBS numbers based on task hierarchy:- Top-level tasks: 1, 2, 3, etc.
- Child tasks: 1.1, 1.2, 1.3, etc. (indented tasks under parent)
- Grandchild tasks: 1.1.1, 1.1.2, etc.
Creating Tasks Visually
What You Can Edit on a New Task
After creating a task, you can immediately:- Name: Click to rename
- Duration: Edit the duration field
- Start Date: Click to change the start date
- Progress %: Set initial progress
- Notes: Add task description or details
Bulk Task Creation
For large projects with many tasks:- Create a task with a descriptive name (e.g., “Phase 1 – Design”)
- Create child tasks by indenting them (Tab key) under the parent
- Repeat for each phase or major section
- Use Import (Module 1.7) to bring in detailed task lists from Excel or CSV
Next Steps
- Editing Task Details — Customize all task properties
- Organizing Tasks with WBS — Build a task hierarchy
- Creating Dependencies — Link tasks together
Tip: Name your tasks clearly and concisely. Use active verbs like “Design”, “Build”, “Test”, “Install” so team members understand the work instantly.